Setting up where to put your finger tape should be placed, all depends on the size of your instrument.
But the calculation is the same for every stringed instrument. whether it’s a Violin, Viola, Cello or Double Bass. whether it’s a 4/4, a 3/4, a 1/2, a 1/8, a 1/16 or any odd size in-between.
It’s a complicated equation so here is a handy Finger Tape Placement Calculator for you
Use a ruler to measure the length of the string from the nut end of the fingerboard to the bridge.
This is also known as the Scale Lenght (S).
“You’re measuring the vibrating length of the open string along the fingerboard.“
Most newer instruments are made to a set size, but this is not always guaranteed. So it is important that you get this measurement right, as it will effect where you place your Finger Tape (fret) markers.
Once you have your measurement,
enter it in to the calculator below. in the S= ‘box’
most 4/4 Violins have a Nut to Bridge lenght of 32.8 cm, and there is a chart lower down the page that lists some of the common sizes for differant instruments.
The Finger Tape Placement Calculator will also so be avalible on our “Best Violin Tuner” App
the 5 boxs will populate with the distance that you need to place each Tape from the Nut.
At this time you will find it easier to mark out the measurements on the edge of a sheet of paper.
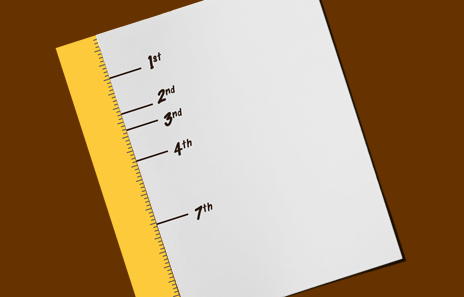
It’s easier to slip a peace of paper with the measurements on, under the strings. Rather than trying to use a tape measure or ruler on your violin, at this stage.
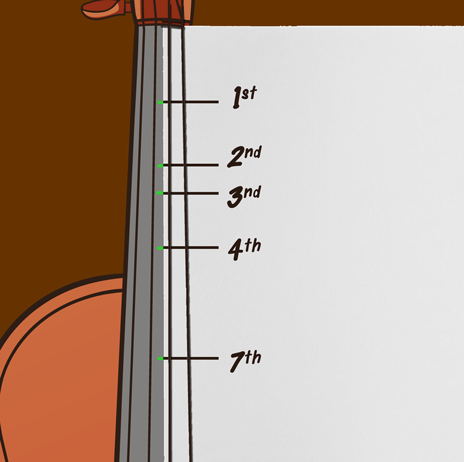
Use a soft lead pencil to mark a line on the fingerboard, right between the D and A strings, in the center of your fingerboard.
As a beginners, you might just want to mark the first 4 positions. Even though it might be a long time before you start playing in 7th position. It is still worth marking this. It is exactly half way along the string. this is the ‘same note’ as the open string, just in the next octive up. And it can be fun to experiment, as you are learning
You can use Tape or Sticky Dots… which ever you prefer.
If you use tape to mark your fingerboard guides, cut a length of tape that is long enough for the ends to meet when you stick the tape across the fingerboard and around the violin’s neck. The tape’s length should slightly exceed the circumference of the violin’s neck.
Having the two ends of tape connected on the underside of the fingerboard.
This will make them more secure and less likely to slip about when you start playing
put your violin safely on a table. Slip the tape under the strings. Start near the bridge, with sticky side facing down toward the fingerboard. Keep holding it up, so that it does not stick. Once you get it up to your pencil mark and then pressing it down when it’s in the right spot. Make sure the tape goes straight across the fingerboard, no diagonals.
The finger guides don’t have to stay on your violin for longer than you need them. Later on, you may want to use the occasional guide to target a tricky new note. You can place guides on the fingerboard as you need them, for as long as you need them.
As you get better at playing, you might want to keep some markers, and don’t want them to be visible.
On the Thumb side edge of the fingerboard, I have the 4 positions marked.
I used little white dots of nail varnish. Only I can see them, and they are almost invisible to everyone else.
remember :- nail varnish is hard to get off.
double check that you marks are in the spot.
| Violins —————- | Violas —————- | Cellos —————- | Bass —————- |
| 4/4 = 32.8 cm | 4/4 = 38.0 cm | 4/4 = 69.5 cm | 4/4 = 106 cm |
| 7/8 = 31.7 cm | |||
| 3/4 = 30.7 cm | 3/4 = 35.6 cm | 3/4 = 60.4 cm | 3/4 = |
| 1/2 = 28.7 cm | 1/2 = 31.4 cm | 1/2 = | 1/2 = 96 cm |
| 1/4 = 26.7 cm | 1/4 = 49.2 cm | 1/4 = 90 cm | |
| 1/8 = 24.2 cm | 1/8 = 80 cm | ||
| 1/16 = 19.8 cm | 1/16 = 70 cm |
You can find more Frequently Asked Questions, on our FAQs page – here
 Patreon


